Swap space becomes necessary in situations where RAM is insufficient, such as when you experience MySQL crashes, especially on small-RAM servers obtained from providers like DigitalOcean or Vultr.
I tried it on CentOS 7. It can be used on CentOS versions, Ubuntu, etc.
We create the swap file with the first command;
sudo dd if=/dev/zero of=swapfile bs=1K count=3M
The part that says 3M indicates that I will create a 3 GB swap area. So if we are going to create a 1 GB swap area;
sudo dd if=/dev/zero of=swapfile bs=1K count=1M
If we are going to create a 10 GB swap area;
sudo dd if=/dev/zero of=swapfile bs=1K count=10M
We enter the command according to the GB we want to open and wait. This space is directly deducted from your disk. I think 2GB is sufficient for moderate use.
With the next command, we grant write permission to our Swap file;
sudo chmod 600 /swapfile
We have given write permission to our swap file created in the root directory.
Afterwards;
ls -lh /swapfile
we check the properties of the created file. The output will be like below;
-rw------- 1 root root 3.0G Oct 23 01:08 /swapfile
As you can see, I created a 3 GB swap file and granted write permission.
In the next stage, we designate the Swap area. Briefly, we say “here is the swap”;
sudo mkswap /swapfile
It will have an output like below;
Setting up swapspace version 1, size = 3145724 KiB
no label, UUID=72e558ce-d33b-4b1c-a434-1d2c99df5990
Then we activate the swap area:
sudo swapon /swapfile
Process complete. Afterwards, let’s verify to see if the system detected it;
free -h
we said, and the output looks like below.

As you can see, the server has 1 GB of RAM. A 3 GB swap area has been formed.
Our process isn’t finished. We must make the process permanent when the machine restarts. We also introduce this process to our fstab file.
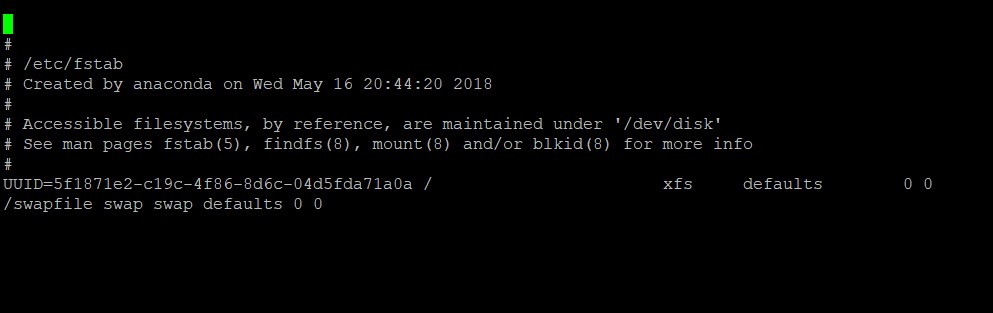
sudo nano /etc/fstab
We said to open this, i.e., the /etc/fstab file, with the command above. Then;
/swapfile swap swap defaults 0 0
we add this code to the bottom of the file we opened.
We pressed Ctrl+x, then y, hit Enter, and saved afterwards.
Or if we wish, we can add it to the /etc/fstab area with a single line command. (Do not give the command below if you added it manually as above)
cat /etc/fstab | grep -q swapfile || echo "/swapfile swap swap defaults 0 0" | sudo tee -a /etc/fstab
Then we reboot the machine. (If you are going to do the fine-tuning, do the fine-tuning below and reboot once at the very end.) And when the machine opens;
free -h
we say. If our output is like below;
congratulations on your swap space.
=========== ![]() DO NOT ENTER BELOW IF YOU DON’T CARE ABOUT THE DETAILS. YOU HAVE ALREADY CREATED SWAP WITH THE OPERATIONS ABOVE.
DO NOT ENTER BELOW IF YOU DON’T CARE ABOUT THE DETAILS. YOU HAVE ALREADY CREATED SWAP WITH THE OPERATIONS ABOVE. ![]() ===========
===========
Swap fine-tuning: (Not mandatory. If you did the steps above, this is extra. Here you determine at what level your RAM should reach before it starts using this swap.)
We created a swap area, but we need to determine at what stage of RAM usage the swap area will be used like RAM.
We can do this with Swappiness.
cat /proc/sys/vm/swappiness
we gave the command. Here on CentOS 7 at DigitalOcean, a value like 30 appears.
Briefly, there is an inverse proportion.
Swappiness value
If it is 10, start using swap area if 90% of RAM is used.
If it is 30, start using swap area if 70% of RAM is used.
If it is 40, start using swap area if 60% of RAM is used.
If it is 80, start using swap area if 20% of RAM is used.
If it is 100, start using swap area if 0% of RAM is used.
we can phrase it like this. Actually, the value 30 is quite good for me. But to explain how to change it, I am giving the details in the section below.
nano /etc/sysctl.conf
we open the sysctl.conf file with the command.
vm.swappiness = 10
let’s set it like this. If not there, let’s add it to the bottom. If it exists, let’s edit it. So the phrasing is;
If it is 10, start using swap area if 90% of RAM is used.
was what we said. We mentioned it above.
Afterwards for CentOS;
/usr/lib/tuned/latency-performance/tuned.conf
/usr/lib/tuned/throughput-performance/tuned.conf
/usr/lib/tuned/virtual-guest/tuned.conf
In all 3 files similarly;
vm.swappiness = 10
let’s change this value to whatever we want. This is done.
Afterwards there is a value called vfs_cache_pressure. As this value approaches 0, files taken into the swap file are kept for a longer time. I don’t recommend touching it, but I am giving the details for information.
nano /etc/sysctl.conf
we open our file with. Afterwards;
vm.vfs_cache_pressure = 100
we write whatever value it will be, 100, 90, 80.
Finally, we check the values of the operations we performed;
Swap check:
cat /proc/sys/vm/swappiness
vm.vfs_cache_pressure check:
cat /proc/sys/vm/vfs_cache_pressure
it gives the value of whatever we adjusted. We reboot our server for some things to take effect. Afterwards, we check our swap area and vm.vfs_cache_pressure values with the 2 commands starting with cat above. We also take a look with the one below.
free -h
We are finishing up.